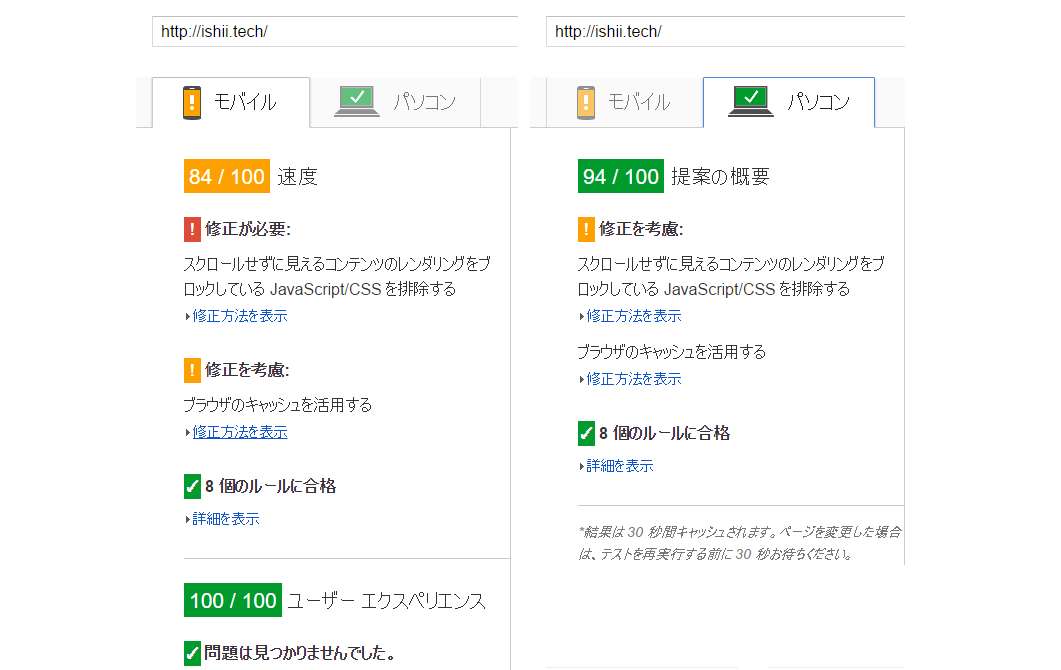
PageSpeed Insightsでサイトをチェックしたらファイルを圧縮するとスコアが上がることが分かったのでスコアを上げるためにこのブログのファイルを圧縮する。
Hexoで生成されたブログのファイル(html, js, css)をgzip圧縮しようと思ったが、Cloudfrontで圧縮ができるみたいなので、Hexoでhtml, js, cssのスペースやコメントなど不要な部分を削除するプラグインをインストールして、圧縮はCloudfront側で実施し配信する。
hexoの設定
Cloudfrontで圧縮できるのでhexo-zip等で圧縮する必要はない。
hexoプラグインをインストール
以下のプラグインを使ってhexo generate時に不要な部分を削除する。
$ npm install hexo-html-minifier --save |
_config.ymlに以下の設定を追加。$ vi _config.yml
html_minifier:
exclude:
removeComments: true
removeCommentsFromCDATA: true
removeCDATASectionsFromCDATA: true
conservativeCollapse: true
preserveLineBreaks: true
collapseBooleanAttributes: true
removeRedundantAttributes: true
removeEmptyAttributes: true
removeIgnored: true
minifyJS: true
minifyCSS: true
uglify:
mangle: true
output:
compress:
exclude:
- "*.min.js?v=*"
clean_css:
exclude:
- "*.min.css?v=*"
S3アップロード
設定後以下のコマンドを実行するとスペースやコメントが削除された可視性の悪いjsとcssが見ることができる。
$ hexo clean && hexo g && hexo d |
Cloudfrontの設定
CloudFrontでDistributionsのBehaviorsで以下の設定を編集する。
Compress Objects AutomaticallyをNoからYesに変更する。
変更が完了したらブラウザでブログに接続して読み込んだjsやcssのContent-Encodingがgzipに圧縮されていることを確認する。
圧縮の効果
どれだけ速くなったかとPageSpeed Insightsのスコアの差について。
レスポンスタイムの平均。
5回のリクエストに対するレスポンスタイムの平均を取った。
圧縮前が1420ms、圧縮後が481msで大体3分の1くらいになった。
PageSpeed Insightsのスコア
| 圧縮前 | 圧縮後 | |
|---|---|---|
| モバイル | 73 | 84 |
| PC | 83 | 94 |
